Communication is key
Last time we learned how to run multiple containers with Docker Compose, but we didn’t quite get our containers to communicate with each other. This time we will do just that.
Here’s the previous post of this series:
Catch up
If you are following and reproducing the examples I provide, at this point please have the containers up and running, as described in the ‘Simple Docker container orchestration with Docker Compose’ part of this series.
How to connect from one container to another?
Previously we got PostgreSQL database system running, along with its admin tool PGAdmin4. What we did not yet achieve was connect the two together. Obviously you first need to add the database server to PGAdmin4 to be able administrate it. With PGAdmin4 in our web browser, click Add New Server to start the process of connecting to the database.
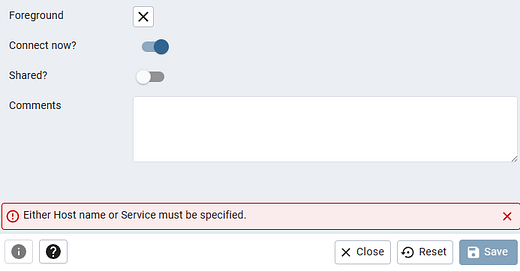
In the dialog shown above, enter a name for the server entry. Note that this is only a name that you wish to see in PGAdmin4 - this is not the name of the machine where the database is located at.
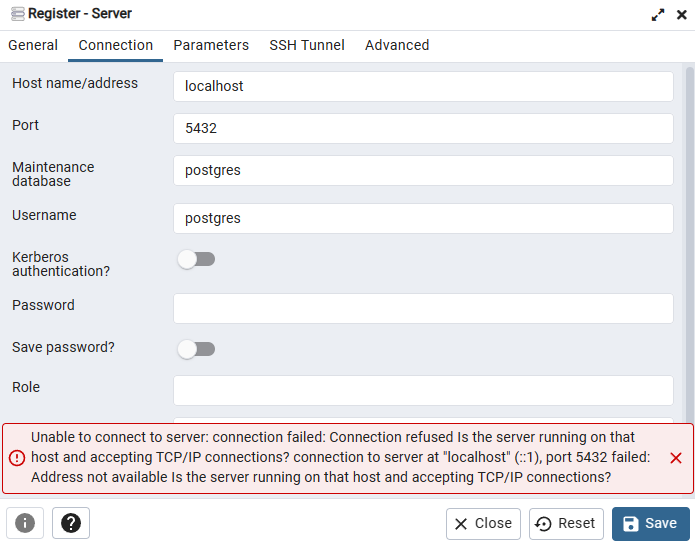
Go to Connection tab, and enter localhost to Host name/address field. Then press Save.
We get an error message on the bottom of the dialog: Connection refused. But why does this happen? We do have our database running on port 5432, as defined in the docker-compose.yml file. Also, we could browse to localhost:8085 and see PGAdmin4, after all.
The reason is, that this is another localhost we just tried to connect to. It is not your computer’s localhost. We tried to connect to the PGAdmin4 container’s localhost. It makes sense, does it not? We have learned before (in the first part of this series) that a container is actually a Linux machine on its own. It has localhost just like any other machine. When we go inside the PGAdmin4 container, and try to talk to localhost, we talk to PGAdmin4’s container. We did just that by browsing to the UI, and gave command to PGAdmin4 to connect to localhost.
The solution
The solution is to connect to the container of the PostgreSQL database. As discussed in the previous part of the series, the containers get their name from the directory your docker-compose.yml lives in. And you can always check what names your containers have by running the following command:
docker container lsThis prints only the running containers’ names. To see stopped ones as well, add -a parameter to the end.
Our PostgreSQL container name is compose-mypostgres-1, so we will try to connect to that one.
And it works!
But why does it work?
The actual reason we can connect from one container to another is, that when we defined them in the same docker-compose.yml, and brought them up, Docker Compose created a network for us, and connected the database and admin tool containers to that network automatically. If this would not have happened, we could not connect them even when using their container names as a host name.
If we run our two example containers without Compose, this would not work, unless we create the network ourselves. Later posts will cover this.
We can see the existing networks with the following command:
docker network lsThis gives us a output similar to this:
NETWORK ID     NAME              DRIVER    SCOPE
56a19d16e12f   bridge            bridge    local
17cbaace6036   compose_default   bridge    local
a26d7826640e   host              host      local
7e93d3c8fbc2   none              null      local
The network our two example containers use it compose_default. It also gets its name from the directory where the docker-compose.yml file is located at. The beginning part compose comes from the directory name, and end part default is always there. So if your docker-compose.yml is in directory abcd, your network name will be abcd_default.
How to know to which networks our container belongs to?
There’s at least two ways to check, which networks our container is a member of.
1 - We can inspect the network:
docker inspect compose_defaultThis prints all information of the network, including "Containers" section. All containers that are part of this network are listed there.
2 - We can inspect the container:
docker inspect compose-mypostgres-1This prints a lot of information, and somewhere near the end of it there is a section "Networks". Check that for information of to which networks this container belongs to. Note that it can belong to more than one network.
Networking is neat
This has been an introduction to container networking. Later I will write about how to create our own networks, and handle how our containers can be connected them. Stay tuned!


